Thursday 31 December 2020

Re-Homing A Spitfire

 So from going from posting quite regularly to nothing for 3 years (and then forgetting to publish it!) TO leaving it another 18ish months here goes.


The car was previously stored at the in laws house where I could pop down, have a tinker in the machine mark tent/garage it was in and come home to the warm.  The tent was very exposed to the wind due to location but held up very very well, with the help of lots of tape!  One morning I got a call, it had finally given up, and in a big way, ripping right down the ridge. So it's early January 2019 and I need to find a way to transport the car circa 10 miles home to the garage but wanted to do so as cheaply as possible!

Step in the next door neighbour who has a farm and the next day the car is on the trailer being transported.


I didn't follow too close as I didn't want to explain to the insurance that my car had come off a trailer and crashed into my car!

And she's home!


So now she lives in the garage, advantage being its much easier to pop out and mess about for a short while at my leisure.  Dis-advantage is that is alot more cramped, and the car tends to be used as a shelf!


Tuesday 16 April 2019

It's Alive...... Sort of

Originally drafted in April 2019 but never posted as I didn't get it finished, just like the car!

A lot of work has gone in recently but a part which has been a real pain for me was the ignition/fuelling.

After the car being off the road for so long I was mega keen to get it started in a true Frankenstein moment.  I hooked everything up, turned the key and.... click. Nothing else.

I managed to find the source of the initial faul, the starter solenoid.  This was quickly replaced, and after making sure it had a good ground (fix it fully to the body tub).  Next up was the condenser, this cheap part caused me a day of heart ache while I figured out it was faulty.  For the cost, just swap it out with the point.

So that was it, I had spark, I had turn over and had fuel, but still it just wouldn't go.  It would fire and roar with a bit of Easy Start, and then just a quickly die.  More fault finding, walking away and coming back with no solutions until it was highlighted regarding the vacuum hose between the carbs.  If this is not on it will not run.

So the moment of truth, and it started (with the choke) and reved very very very high.  Kill the engine, it obviously needs setting up

A little bit of investigation and the reason for this was it was sucking in lots and lots of air as the carbs weren't fully tightened and the cabs should be set up to approximately, 12 flats out on the mixture nut. This is a good starter for 10!

Saturday 23 July 2016

Replacement Battery Box

As you can imagine, a steel battery box, in a 30 year old car is a prime location for rust.  Mine was subject to this, with a few small holes right on the curve.  As with everywhere else on the car I tried to repair this, however owing to the location (on the curve) and my poor welding skills, the repair was bad to say the least!

So the decision was made to replace the battery box.  This means drilling out the spot welds (all 10,000 of them, or at least that's how it felt!) bending back the brackets and pulling out the old box


Terrible
repair visible in the middle back

One bracket free!


All ready to prise out the old box!

As you can see I previously stripped the bulkhead and lightly painted and then abandoned it, this area needs some work!


The new box, disappointingly, does not come with the connection for the drainage pipe.  My first thought was to cut the old one out and weld it in but then I had a brainwave to use a pipe insert.  I checked the size and it's fine so that's a job for the future.


Old spot welds are flatted and a dusting of weld through primer.  I spray this on so that there is no bare metal under the lip of the new box


New box welded in and the spot welds dressed flat.

You'll notice that the back edge (which has got to be bent up to meet the kick in the bulkhead) hasn't had any spot welds in.  I have done this as the box is not moving out of place and so I didn't see the need for them


More updates to come of the previous works, but these will come in nor particular order!

Sunday 21 February 2016

All Happening In The Background

So it's been a while since an update and from the outside due to lack of updates its may seem that there has been little to no progress.  But it's been happening in the background.  So over the next few days/weeks I will try to put up some updates of the various different stages the build has been through.
Stay tuned!

Sunday 23 February 2014

Brake drum adjusters refurb

I've managed to get my drive to work on the car again but among others things that have been done I thought I'd do a quick write up on how to return your red broke drum adjusters.
I found that mine would turn difficultly and also didn't feel the flt so you know how much you had adjusted it. Whilst they are one £8-9 to but why not have go at fixing your existing!

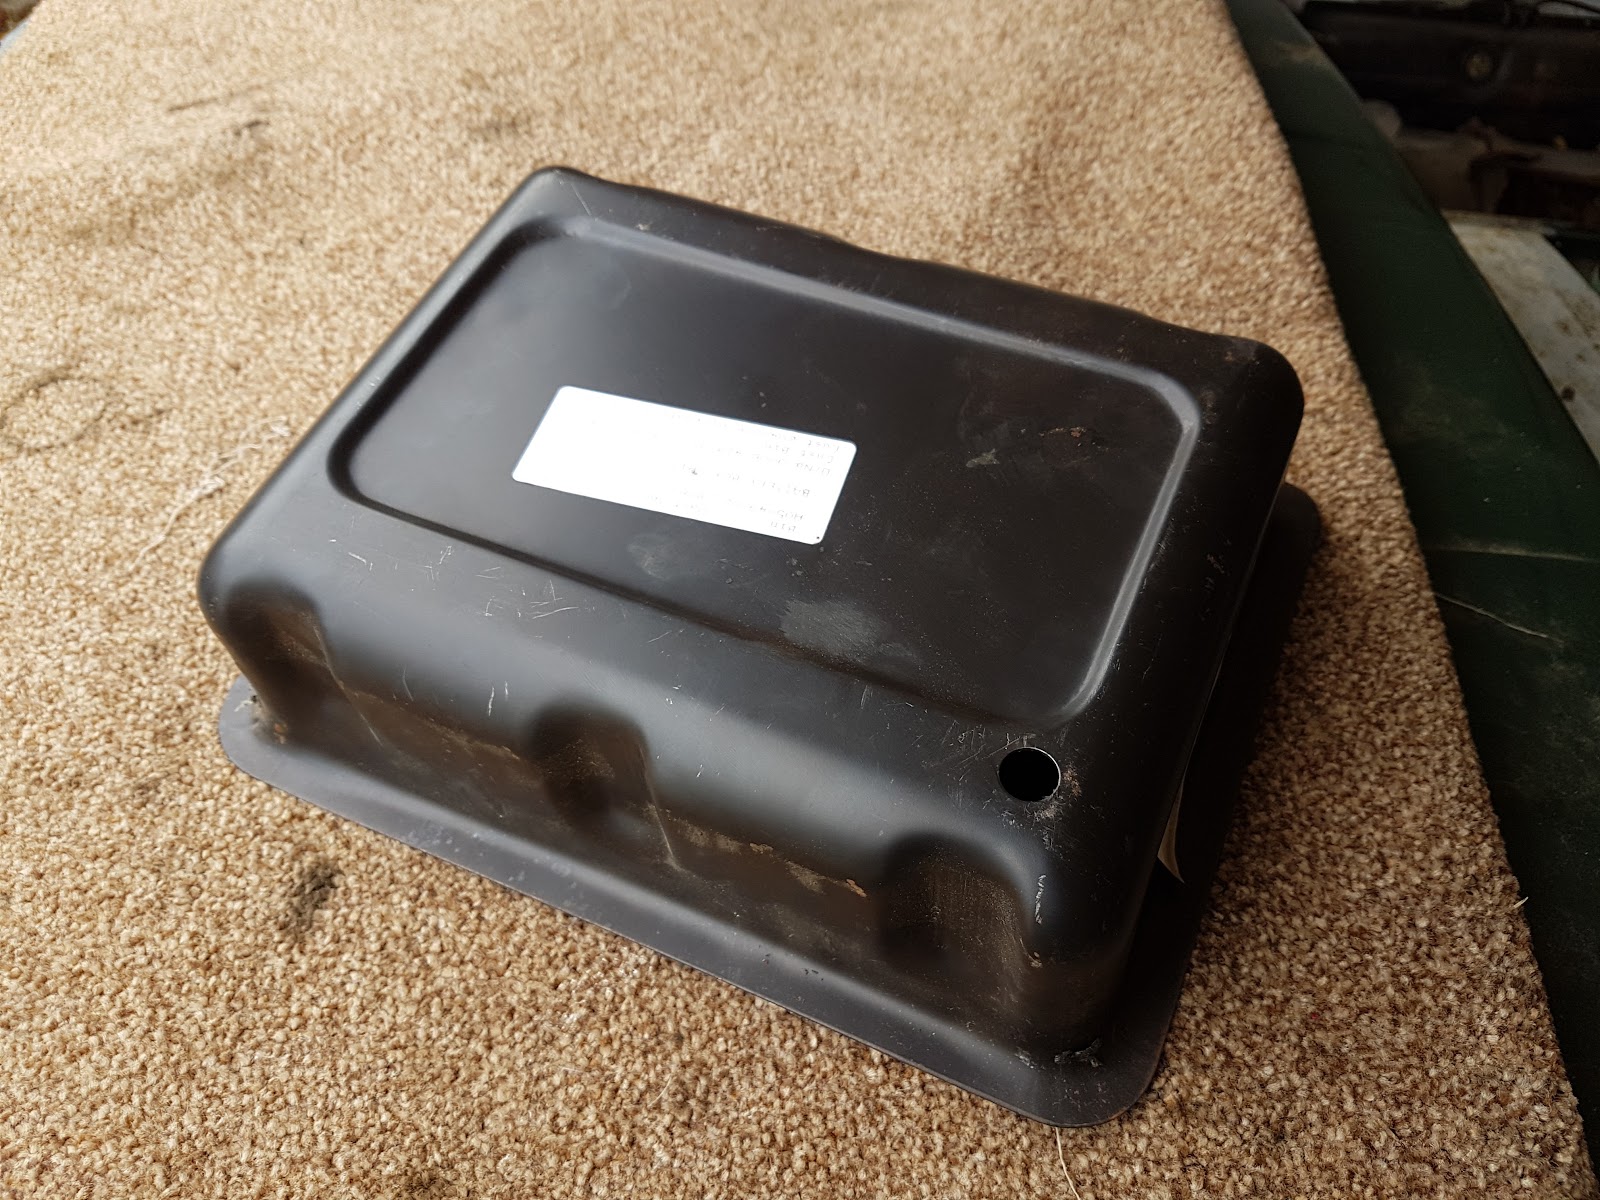
My left one was quite cruddy as you can see
So the first step to do is full wind in the adjustror from the trrar as it comes out of the front, when it gets to the point that you can no longer turn it it'll take one !pre turn with so!e need nose pliers.
After this you can simply push\pull the adjustor cone out, while we have this it's time to clear it up, put the threads on the wired wheel as remeber these are always exposed under the car so keeping them clean coated will help protect them. The cone itself just needs too be cleaned with a cloth, no abrasives and inspect it to check it still has the flats pon it to indicate adjustment.

You'll have noticed that that while taking the adjustor cone out it pushed out the shoe spacers, these can easily be pulled out but make sure you note which way they are tapered otherwise the adjustors won't work.

Shown how they are tapered is in this photo
Against while these are handy out then on the wire wheel to clean them up

Next tackle the actual adjustoer housing itself. Rather than strip and re-paint I opted to wire brush the thick of and cloth clean the insides. Its as clean as its going to get!

Now its time to put it back together and remember, Copper slip, let's not have these seazing up again! 
Copper slip the shoe spaces and re-insert, make sure they aren't pushed in top close as you still have to fit the adjustor from the front.
Finally copper slip the threads of the adjustor and re-fit, loosing back into place and you're done.

When re fitting I intend the put more copper slip in the hole as shown above, Grantred because it will be in the brake drum it will pick up some dust but my thoughts are it stops the dust getting to the spacers/pistons.

Hopefully this helps someone!

Tuesday 9 April 2013

The Painting Has Begun

Well this update has been a long time coming, don't think it's because I havent done anything because I have but now that I am temporarily out of work I can spend more time on my projects.
I thought for something different today I'd tackle some painting (being as recently I'd been welding, learn by doing -more on that in future)
First I needed somewhere to paint, so after looking a I decided a nice big poly tunnel should do, it would help keep the temperature up required for painting

Next the pannel, I picked the boot lid as its small enough to practice on. After stripper all of the old paint off and lots of filler I was down to bare metal and ready to apply some etch. Pannel wipe everything to make sure it was clean and time to play with my new Apollo Spraymate toy.
Overall I'm quite happy with how it looks thought it still has to dry.

I'll get some more updates regarding the body very soon!


Tuesday 9 October 2012

Big Steps - The Strip Out Begins

Well its been a long while since I've posted anything and lots has changed. After removing the carpets from the boot to find a hole (un) cleverly covered with a carrier bag so as you would expect, a lovely that patch. So whilst preparing to fix this I though I might as well look over everything else. This opened up a whole can of worms which led me to strip out the car a d the. Take the body off!
I'll update with some pics of the welding later but needless to say it gave me plenty of time to practise as I'd never welded before.
As the doors were taken off the openings were braced using some tube steel with the ends flattened and bent then bolted into existing holes.

Also if I was going to remove the body again I would certainly suggest more than 2 people as its is a lot heavier than you may think!